Adding items
To make the car we will need at least a chassis body and two wheel bodies, and we'll also add a 'driver'
to demonstrate adding more than one fixture to a body.
Most item addition actions are done through the action menu. The action menu can be found in the main menu
(Scene -> Actions) or by hitting the space bar in an editor view.
Many of the actions in this menu depend on what items are currently selected, or where the cursor is. For
adding new items the position of the cursor is important because that's where the new items will be placed.
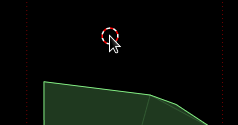
To set the cursor position, hit 'C' and then left click where you want the cursor to move to. Since we will
be rolling the car down the hill, we might as well start building it at the starting position. Place the cursor
somewhere at the top of the hill:
Adding a body
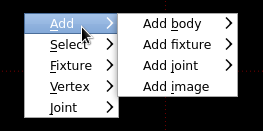
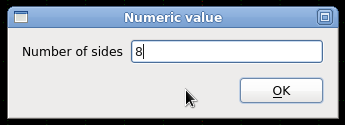
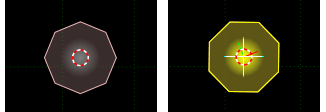
Now from the action menu, select Add -> Add body -> Add body with n-sided polygon fixture. In the dialog
that appears, let's give the polygon 8 sides.
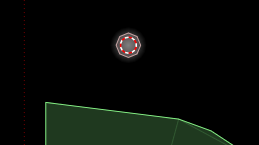
This will always create a polygon with a vertex at the 'east' position, but for this example we would rather
have a polygon with some sides horizontal and vertical. We can easily get that by rotating the body a bit (this step
is not really necessary, it just makes a nicer looking car):
More about editing bodies.
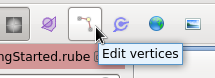
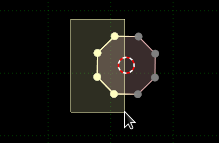
Now let's stretch this polygon out sideways. Hit 'V' or use the button in the toolbar to change to vertex edit mode.
Select four of the vertices on one side of the polygon by dragging with the left mouse button to make a rectangle
around the vertices.
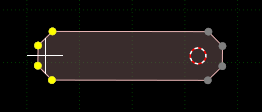
Move the selected vertices as we did with the ramp body by hitting 'T' to translate. Place them out to the left to make
the main part of the car body. If you want to move them perfectly horizontally, you can hit 'X' while translating
to restrict their movement to the X axis.
More about editing vertices.
Adding a fixture
To demonstrate adding more than one fixture to a body, let's add a circle fixture to pose as the driver.
Once again we will use the action menu, and once again the action depends on what is currently selected in
the scene. In this case we are about to add a fixture, and a fixture must have a
body to be fixed to. Before opening the menu to add a fixture, quickly switch back to body edit mode (hit 'B')
and check that the car body is selected.
Now from the action menu, select Add -> Add fixture -> Circle.
Oh... the fixture will be added at the cursor position, which is still inside the car body.
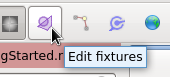
Well, we can fix that by moving the new fixture to a better position. Hit 'F' or use the button in the toolbar to change to fixture edit mode.
Notice that fixtures are highlighted in purple instead of yellow, to remind us of what we're selecting.
Now we can select the new fixture and translate it in the same way as we did for bodies and vertices. Place it somewhere so that the driver
can see his impending doom approaching. How about scaling it down a bit too... dare-devil stuntmen may well have big heads, but not as big as that.
More about editing fixtures.

If you're feeling generous you could spice things up with another fixture to make a windshield (Add -> Add fixture -> Add square, and then stretch/rotate),
or you could even arrange the existing vertices of the car so that the car and the windshield are made from the same fixture.
Adding a joint
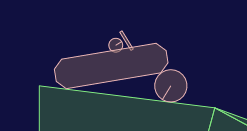
Okay, we need wheels to get this thing rolling. To add a wheel body, move the cursor to a suitable
position for a wheel ('C' -> left-click) and select Add -> Add body -> Add body with circle fixture from the action menu.
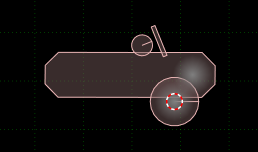
That looks nice, but if you run the scene in a player view (Ctrl+R) you will of course see that the wheel
is not attached to the car, so they just fall apart.
We can use the action menu to add a revolute joint to connect the car body and the wheel. As usual,
the outcome of the action menu depends on what is currently selected in the scene. We need to first
select which two bodies should be connected by the joint we are about to add. Switch to body edit mode (hit 'B')
and select both the car body and the wheel. You can select more than one body by holding down the Shift key
while clicking them.
The order in which the two bodies are selected is important. The first body selected will become bodyA
of the joint, and the second will become body B. It is also important to make sure you have only two
bodies selected before adding the joint, otherwise the bodies to be connected may not be what you expected.
You might like to first deselect all bodies by left-clicking somewhere on an empty area of the scene.

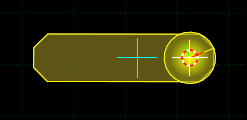
Once you have the two bodies selected, you can select Add -> Add joint -> Revolute from the action menu.
The joint will be placed at the cursor position, and we want it in the center of the wheel so don't move the cursor just yet!
At first nothing appears to have happened, but if we switch to joint mode (hit 'J') we can see the created
joint at the cursor position.
Test the scene (Ctrl+R) to check that the wheel behaves as expected. Hmm... so one wheel is not enough
to jump the chasm huh.
Copying a joint
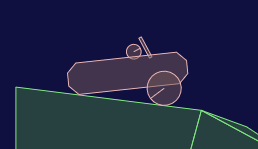
Let's duplicate the wheel body we created - this is done by selecting the wheel body and pressing Shift+D (in body edit mode!).
Immediately after pressing Shift+D the newly duplicated body will be selected and undergoing translation
so we can move it to the new position right away. You can hit 'X' while translating to restrict
the movement to the X axis.
When bodies are duplicated, any joints they are connected to will be duplicated too. In this case, the wheel we
duplicated was connected to the car body, and anchored at the front of the car. Try testing the scene now, and
you will see that the newly duplicated body is also anchored at the front of the car.

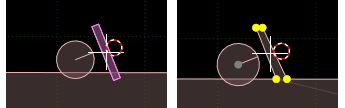
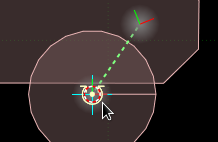
To fix this we need to change the anchor position in the car body. Switch to joint edit mode (hit 'J') and select the
joint for the rear wheel. Now you can move the joint anchor by starting a translation as for the other item types by hitting 'T'.
If you made the car chassis bodyA of the joint, you can just hit 'T' one time to move the anchor A of the joint.
Otherwise you can hit 'T' again to move anchorB of the joint. In any case, the anchor you want to move is the one
with a blue or green dashed line between it and the car body nub:
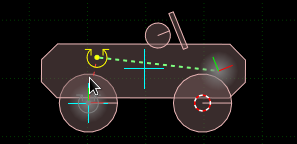
If in doubt, hit 'T' a few times while moving the mouse around and it should be clear which anchor is the anchor in the car body.
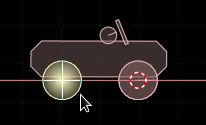
Move the anchor to the center of the rear wheel.
Another way to tell if you have this correct is the red dashed line between the two anchors, showing how disjointed they are. When the simulation
runs, Box2D will try to force the two anchors together along this line. The anchor should be placed so that this line is reduced to nothing.
More about editing joints.
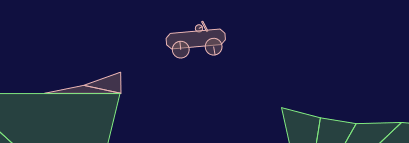
That should be all we need for this brave little car to defy death and jump over that enormous canyon. Please don't try this at home!
Next: Saving the scene