Customizing the properties panel
By default the properties panel shows every property for each item.
In scenes with many custom properties, it can become cumbersome to find the property you
are looking for among many others that are often irrelevant to the currently selected item.
For example
you might give bodies a 'speed' property so that you can set the speed of enemies in your game.
But for other bodies, speed might not be relevant - for example a tree would not use that property.
You can use a script to customize which properties are shown in the properties panel for each item.
This 'property display filter' script is set in the Scene settings dialog under the Export options tab:
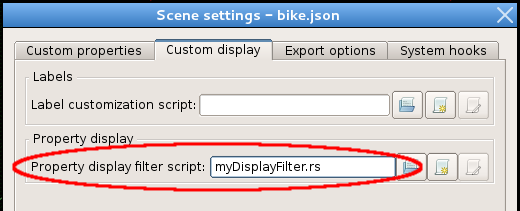
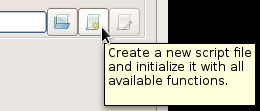
The contents of the file must follow a special format, so to create a new script with the
format already prepared, you can click the second button to the right of the text input.
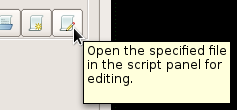
For convenience, there is also a third button button which will open the given file in the
script panel for editing (this button will only be enabled if the script file actually exists):
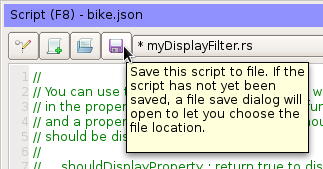
After initializing a new script, you will see that it contains a bunch of commented out
functions. You can uncomment these functions to customize the export behavior
as necessary:

To apply the changes after editing the script file, click the save button in the script panel:
Customization examples
When displaying the properties panel, the application will call the shouldDisplayProperty function
for each property that the selected item has, to let the script decide if it should be displayed.
The item and the property name are passed as function parameters.
As an example, we could say that for static bodies, all properties that are only relevant to dynamic or kinematic
bodies should not be displayed:
bool shouldDisplayProperty( body b, const string& in propertyName ) {
    if ( propertyName == "bullet" ||
         propertyName == "fixedRotation" ||
         propertyName == "sleepingAllowed" ||
         propertyName == "linearDamping" ||
         propertyName == "angularDamping" ||
         propertyName == "mass" ||
         propertyName == "gravityScale" ||
         propertyName == "linearVelocity" ||
         propertyName == "angularVelocity" ||
         propertyName == "awake" )
            return b.getType() != 0;
    return true;
}
Note that we have to check the propertyName parameter to know which property the application is asking about.
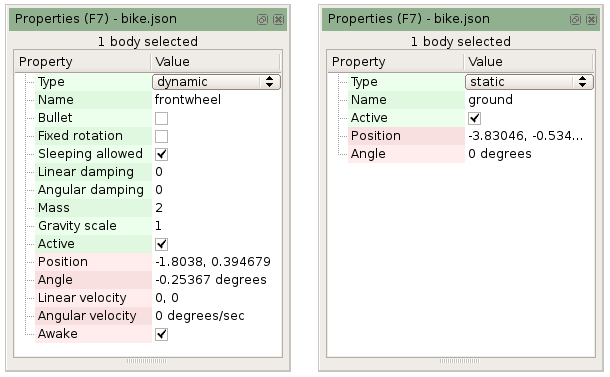
Here is how this script affects the appearance of the properties panel. On the left a dynamic body is selected,
and on the right a static body is selected.
Handling categories of properties
As mentioned above, sometimes you might want to show only subsets of the custom properties for an item.
Let's look at an example of how you might do this for a scene with two categories of bodies - animal, and scenery.
Animals would be things like a cat or a dog that can move around, and scenery is static things in the background
like a tree or a lamp-post.
For the animals we might have custom properties like speed and jump height. For the scenery we might have
custom properties to say whether it can be climbed up or provides a place to hide. Suppose we added all these
to the body class, and had two bodies as below. On the left is Scratchy the cat, and on the right is a tree.
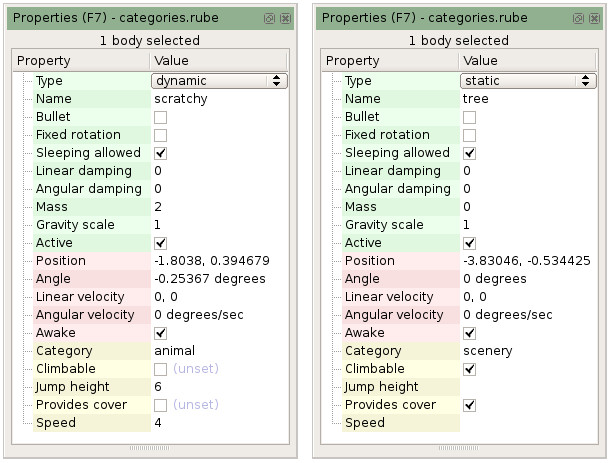
To restrict the display of these custom properties to only the items where they are relevant, we can write
the shouldDisplayProperty function like this:
bool shouldDisplayProperty( body b, const string& in propertyName ) {
    if ( propertyName == "speed" ||
         propertyName == "jumpHeight" )
             return b.getCustomString("category") == "animal";

    if ( propertyName == "climbable" ||
         propertyName == "providesCover" )
             return b.getCustomString("category") == "scenery";

    return true;
}
Now, only a subset of custom properties will be displayed:
