Item labels
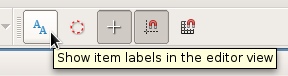
You can turn on the display of item labels in an editor view with this button in the toolbar:
The size and type of the font used for these labels can be changed in the Options dialog
under the Fonts tab.
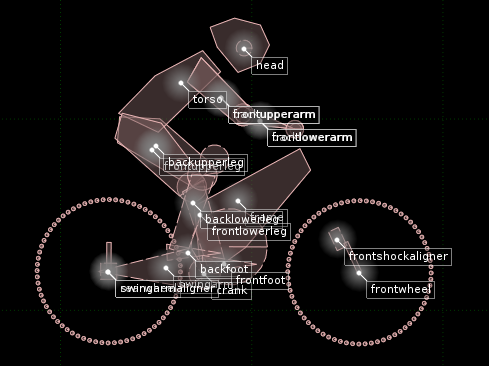
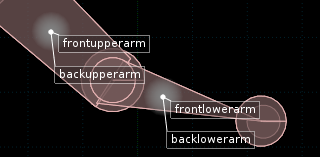
The labels shown will depend on the current edit mode of each editor view, so for example when
in body edit mode as in this screenshot, labels for bodies will be shown.
Dynamic positioning
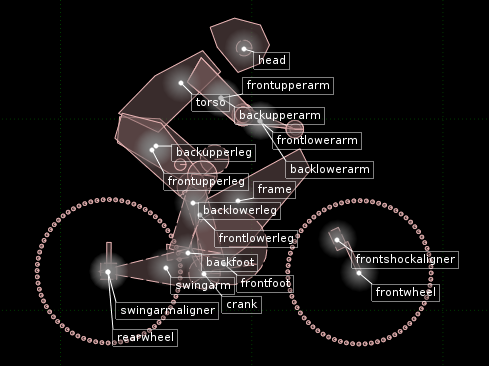
In the example screenshot above, we can see that some labels are overlapping others and it
can be hard to read them all. Zooming in closer to that area can help to make more space
between them, but sometimes the labels are simply in the exact same place, in which case
no amount of zooming in will help.
To help improve this situation, you can turn on "Use dynamic label placement" under the Controls
tab of the Options dialog. This will give each label a physical body (using Box2D of course :)
and the labels will try to push apart from each other to prevent overlapping:
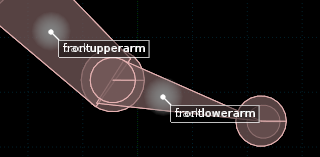
While this improves visibility in some cases, it's not always helpful. Notice how there
are a large number of fixtures in the wheel of this bike model. Let's see what happens
when we switch to fixture edit mode:
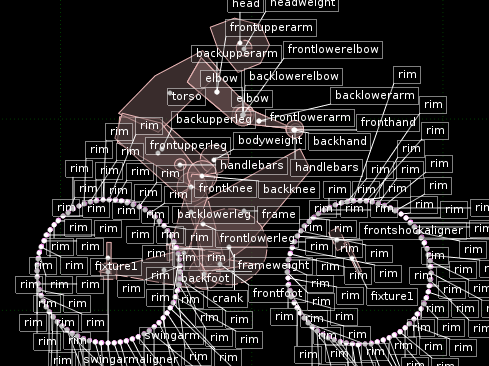
Now this is not so convenient! See the section below on how you can customize labels
for each item individually, to strike a good balance in the amount of info shown.
Customizing label content
The default content for labels is the name of the item, and the default coloring is
white text on a half-opaque black background. You can use a script to customize the text
shown in each label, and the colors used to
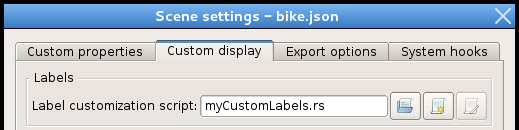
display them. The script file to use is set in the Scene settings dialog under the Custom display
tab:
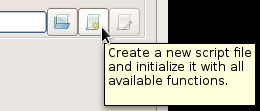
The contents of the file must follow a special format, so to create a new script with the
format already prepared, you can click the second button to the right of the text input.
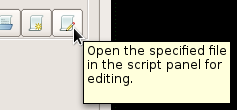
For convenience, there is also a third button which will open the given file in the
script panel for editing (this button will only be enabled if the script file actually exists):
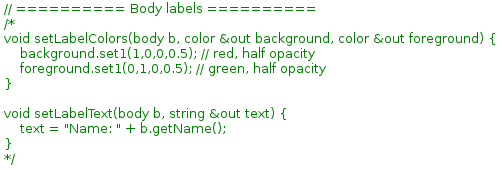
After initializing a new script, you will see that it contains a bunch of commented out
functions. You can uncomment these functions to set the colors and content for labels
as necessary:
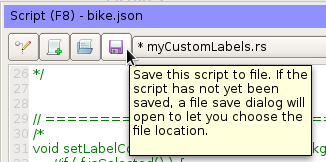
To apply the changes after editing the script file, click the save button in the script panel:
Customization examples
As an example, let's set fixture label colors so that the background lets us quickly see their
friction. We can also set the text content to display the friction inside the label as well:
void setLabelColors(fixture f, color &out background, color &out foreground) {
    float r = f.getFriction();
    background.set1(r,1-r,0,1); // red and green taken from friction value
    foreground.set1(0,0,0,1);   // black text
}

void setLabelText(fixture f, string &out text) {
    text = "Name: " + f.getName() + "\nFriction: "+f.getFriction();
}
Note that we are assigning values to the variables that were passed in as parameters to the
function. These are designated as &out parameters, meaning the application can read back
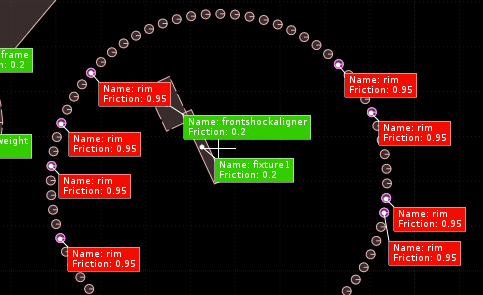
those values from the script. Here is the result:

To prevent labels from showing at all, you can set the text to an empty string.
We can use this feature to improve the situation shown above where there are so many labels
for the wheel rim fixtures that they clutter up the scene.
Exactly how you decide to do this depends on your situation and requirements, but as an
example, we might like to display labels for the rim fixtures only when they are currently
selected. To accomplish that, we can check the name and selection status of each fixture,
and do nothing for rim fixtures that are not selected:
void setLabelText(fixture f, string &out text) {
    if ( f.getName() == "rim" && ! f.isSelected() )
        return;
    text = "Name: " + f.getName() + "\nFriction: "+f.getFriction();
}
(In the screenshot below, note that only some of the rim fixtures are selected.)