Distance joints
See here for a video explaining this topic: YouTube
To edit joints you must first be in joint edit mode (shortcut key 'J').
Distance joint creation position
A distance joint will be created with the joint anchor position for body B placed at the cursor position.
The joint anchor for body A will be at the location of body A.
In the image below, suppose the cup-shaped dynamic body should hang from the static body as if it were
a hanging potted plant. In this case we would place the cursor at the position on the dynamic body that
should be the anchor position on that body. To make sure that the static body becomes body A, we select
it first when selecting the bodies.
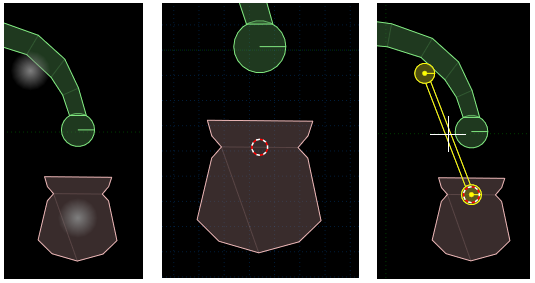
As in this case, sometimes the anchor position in bodyA will need to be adjusted after joint creation.
Moving joint anchors
Distance joint anchor positions can be translated and rotated in a similar way to other items. The main difference
is that one joint has two joint anchors. Initially the manipulation will start with the joint anchor for
bodyA, and you can switch between joint anchors while manipulating them by hitting the same key that started the manipulation.
For example to begin translating joint anchors you would hit 'T', and this would begin translation of the joint
anchor for body A. Hitting 'T' again would switch to translation of the joint anchor for body B.
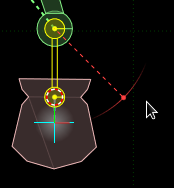
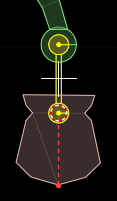
Setting joint target length
When the current length of joint is longer or shorter than the target length a red dashed line
will be displayed to show how far the current length is from the target. Here is how the example case above would
look if we moved the joint anchor in body A without adjusting the joint target length.
Hitting 'T' a third time while translating the joint anchors will allow you to set the target length of the joint.
During this mode the joint length will be displayed as a red dashed line and a partial arc (when the target
length and the current length are very close these will be displayed in green).