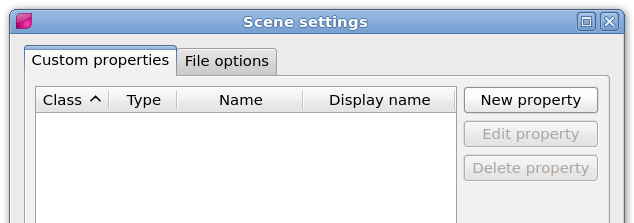
Creating custom properties
Custom properties can be created, edited and deleted in the Scene settings dialog, which is opened
from under Scene in the main menu.
To add a new property, you need to specify the class, type, name and display name for the property.
Class specifies which item the property will become a member of, and type is the data type of the property.
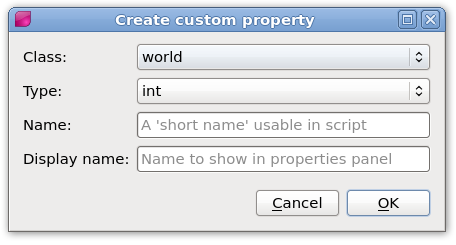
Name is a 'short name' which must be suitable for use as a variable name in script. This means it must
contain only letters, numbers or underbars, it must not start with a number, and it must be at least one
character long. This name will be used to access the property in script, and is exported to the 'raw info'
JSON files. This is the name you will use to access the custom property values after loading the world
into your own program.
The 'display name' is used as the title of the property in the properties panel, and in tooltips.
You can use any kind of string for this display, including non-alphabet languages, symbols and punctuation.
It is not exported to 'raw info' files and exists only to allow more customizable display while using
the editor itself.
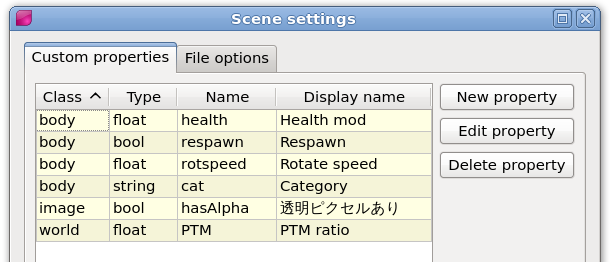
All custom properties are shown together in the scene settings dialog, and you can use the column headers
to sort them by the values in each column.
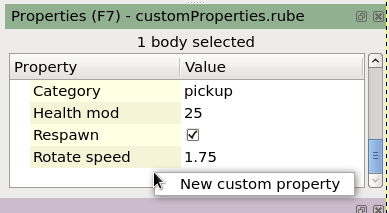
You can also open the custom property creation dialog directly from the properties panel, by right-clicking
in the 'Property' column or in the empty area at the bottom.
Undo/redo support
You can undo and redo all aspects of creating, editing and deleting custom properties. One thing to keep
in mind is that each individual change has a corresponding undo action, and the changes are applied immediately, even
while the Scene settings dialog is still open.
For example if you open the settings
dialog and add three properties, after closing the dialog you would need to undo three times to completely reverse
the changes. If in doubt, check the undo/redo menu display to see what will happen if an undo operation is
performed.
